
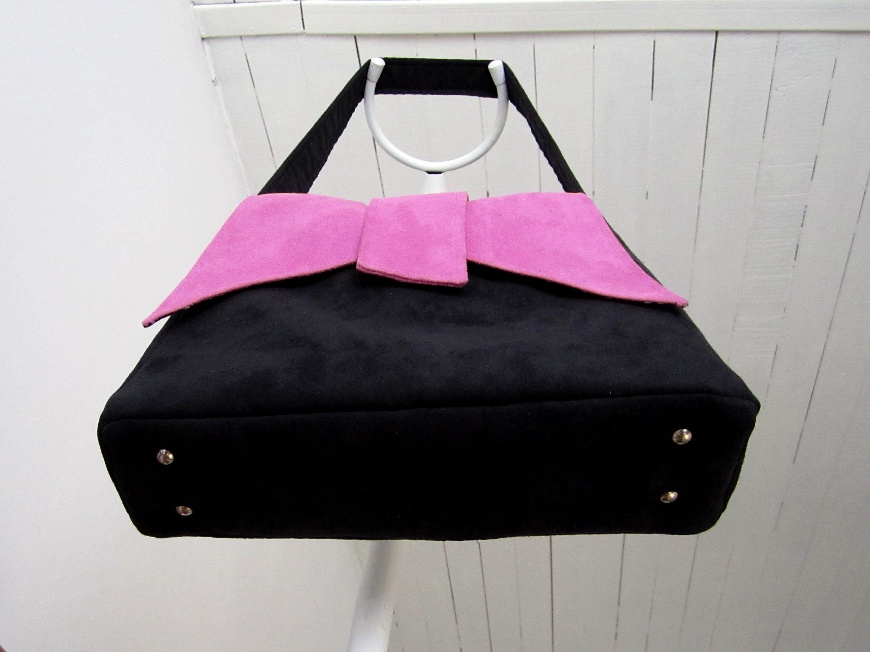
Bag feet are a sophisticated touch and adding a bag bottom can greatly enhance the silhouette and convenience of your bag, so today let’s have a ” How to add a bag bottom and bag feet tutorial ”
There are many ways to add a rigid or semi-rigid bottom to a bag, the method I propose here is quick, easy and allows you to add structure to any flat bottom bag, even store bought ones. The installation of the bag bottom is combined with the purse feet installation.
How to add a bag bottom and bag feet tutorial
For this tutorial I will add a bag bottom and bag feet to the Ava bag. This technique can be applied to any bag with a flat bottom : you can also use it for the Alex bag or the Annie bag for example.
Supplies
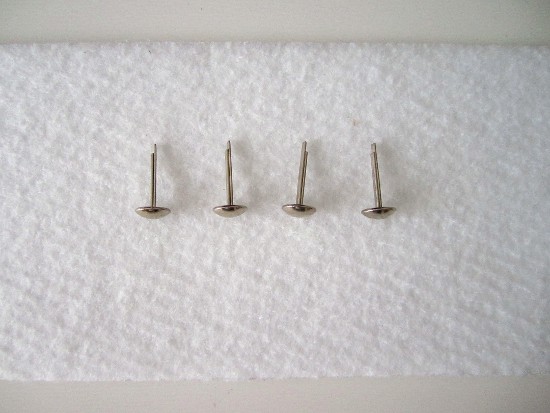
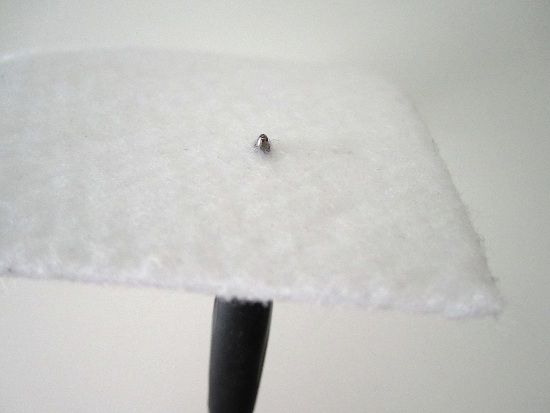
- 4 purse feet, they look like large brads.
- Ultra firm heavyweight sew-in stabilizer : like Jeffytex or Pellon 70 Peltex
The feet size is a matter of aesthetic and personal preference. My choice here for the Ava bag is to use 9 mm=3/8″ (diameter) feet.
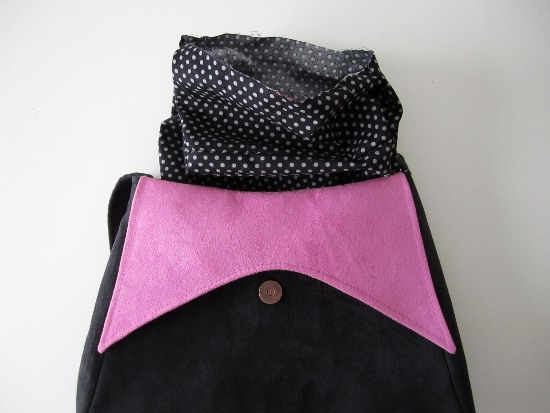
Prepare your bag
If it is a store-bought bag or a bag that you’ve finished sewing you’ll have to open the lining bottom seam using a seam ripper. An opening of 15 cm (6″) is usually enough.
If you’re still sewing your bag, install the semi-rigid bottom and feet before closing the opening in the lining.
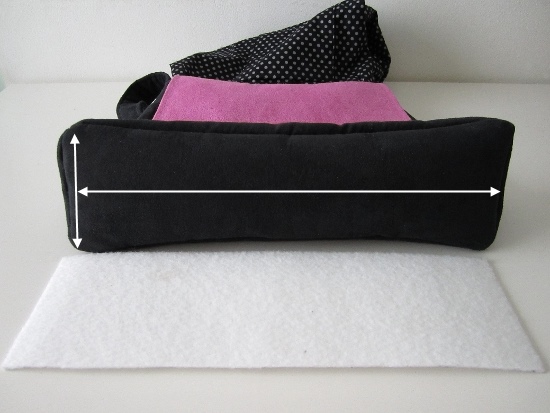
Cut the ultra firm stabilizer
Cut a rectangle :
- Length = length of the bottom of your bag – 1 cm (3/8″).
- Width = depth of your bag at the base.
Ex. for the Ava bag I’m cutting 29 cm long by 9 cm wide rectangle.
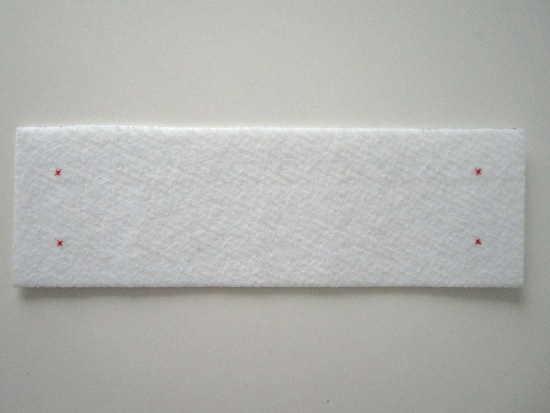
Mark and slash the markings on the stabilizer
1- On the stabilizer trace the 4 feet placement markings, positioning each one in a corner and 2.5 cm (1″) from each edge.
The position of the feet is a matter of personal and aesthetic preference, but make sure they are not too close to the edges.
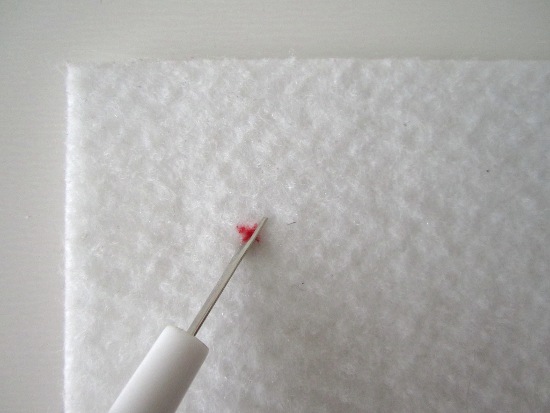
2- Cut through the 4 markings.
Here is how to do it without any special tool :
Through the marking, slit a cross shape with a seam ripper, then use the tip of a pen to enlarge and round the hole.
3- Trim the corners of the rectangle to round them slightly.

Report the markings on the bag
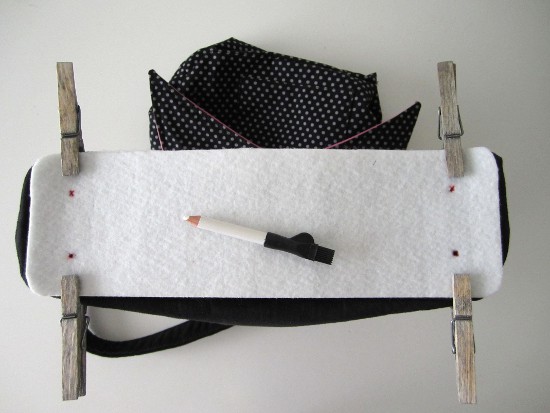
1- Position the stabilizer against the bag bottom right side, centering it between the seams.
Hold tight (use clothespins if needed) and report, through the stabilizer holes, the 4 markings on the bottom of the bag.
To mark I use a sharpened chalk pencil.
2- Remove the stabilizer and nick carefully with a seam ripper, the 4 bag markings. During this step slide one hand in the bag, through the lining opening to make sure you nick only the intended area.
If the feet are small enough one slit will be enough, but if the feet prongs are widely spaced (it’s often the case for larger purse feet) you may need to make two slits side-by-side and then slide each prong in one of these slits.
Install bag feet and bottom
1- Slide the stabilizer inside the bag through the opening left in the lining. Slide it in place in the bag bottom.
The stabilizer is now between the bag and the lining.
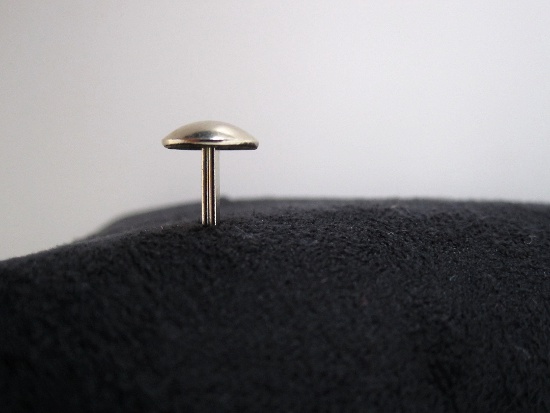
2. Slide the prongs of a foot through a slit in the bag bottom, toward the inside, then slide the prongs through of the hole in the stabilizer.
3. Inside the bag, fold the prongs apart over the stabilizer.
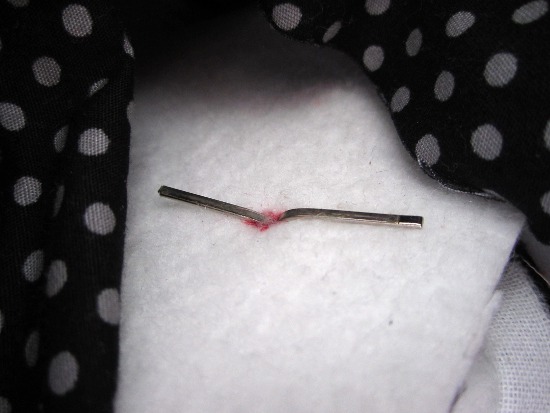
4. Repeat step 3. for the 3 remaining feet.
The feet are now holding the stabilizer inside the bag.
5. Stitch the opening in the lining close, folding in the seam allowances.
Voilà you’ve just added a bag bottom and bag feet to your purse !

Excellent, excellent! I’ve been looking for detailed instructions on placing the feet. You have the best ability I’ve seen so far in conveying the smallest details. Thank you for sharing your knowledge.
Donna
Virginia, USA
Thank you Donna !
Bonne couture 🙂