
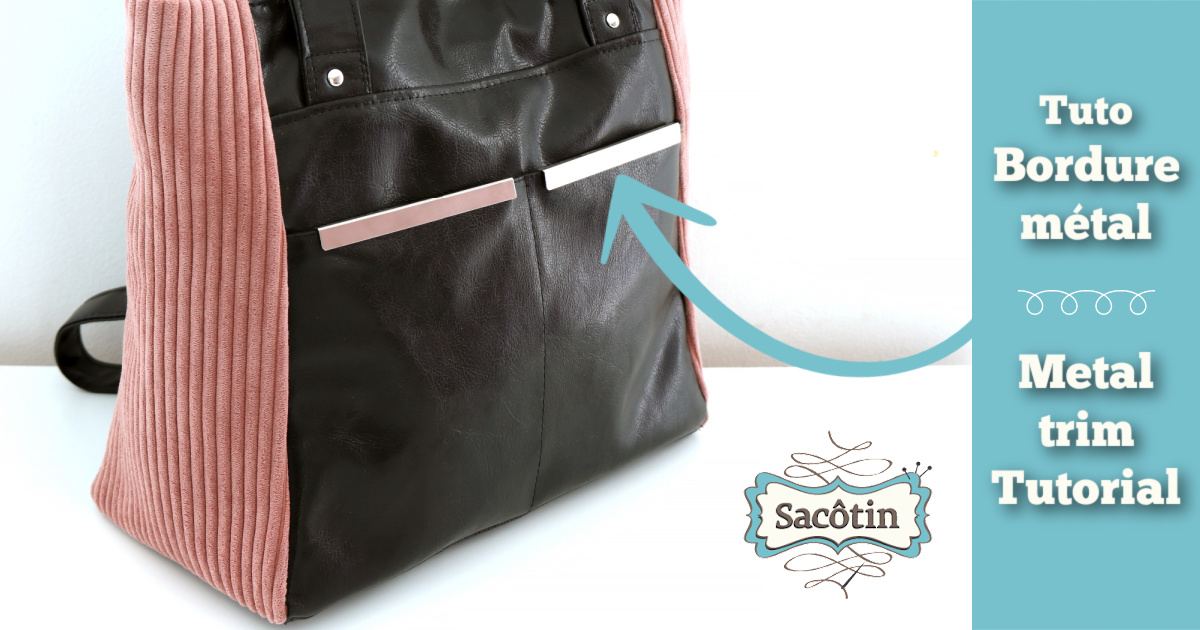
Learn how to install a metal trim on a bag, whether on a pocket, a flap,… A metal trim can bring the little extra touch of bling to your bag.
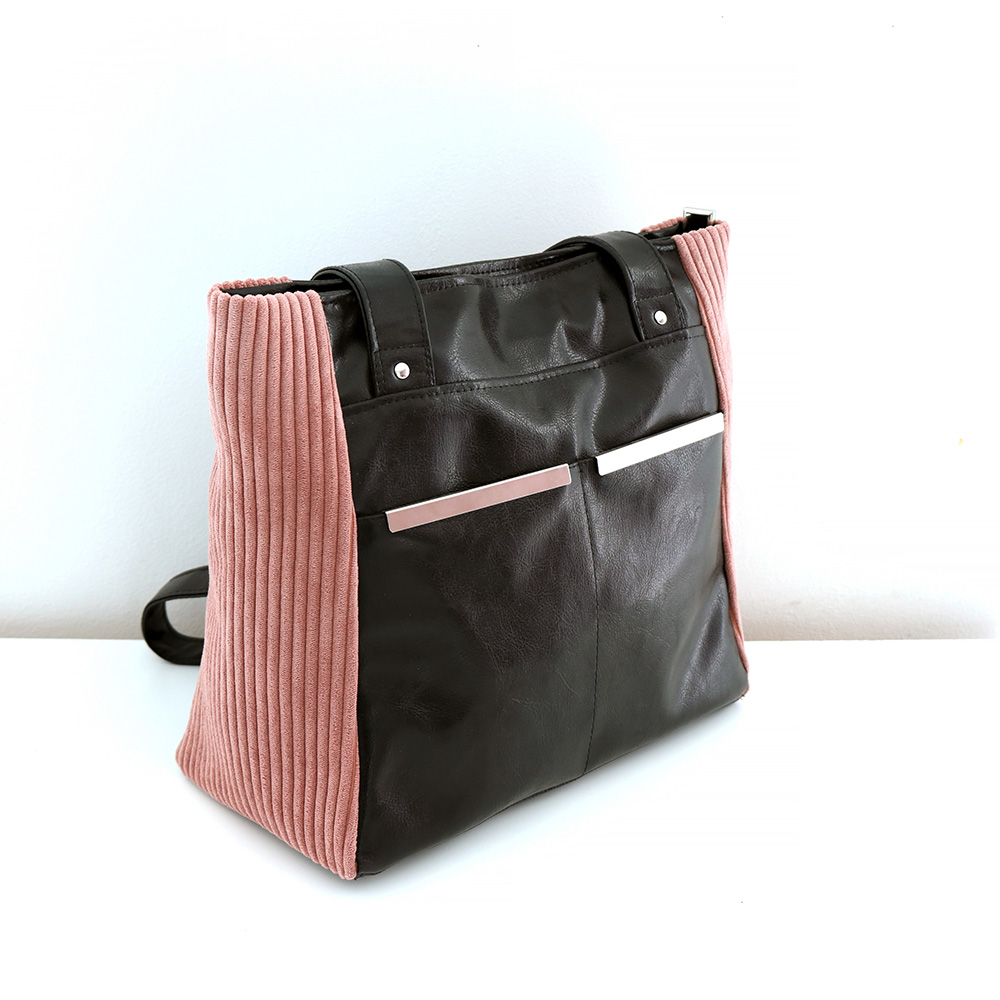
2 straight metal trims, nicely embellish the look of the Cadence bag for example.
Install a metal trim
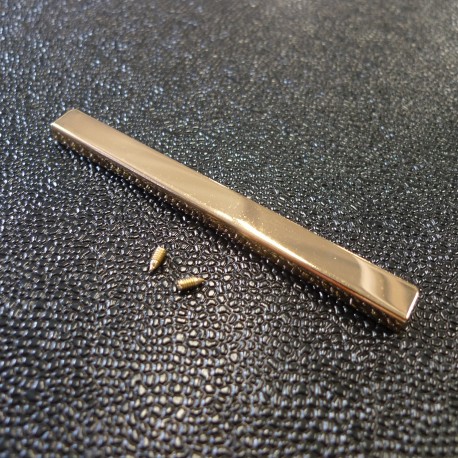
Needed supplies :
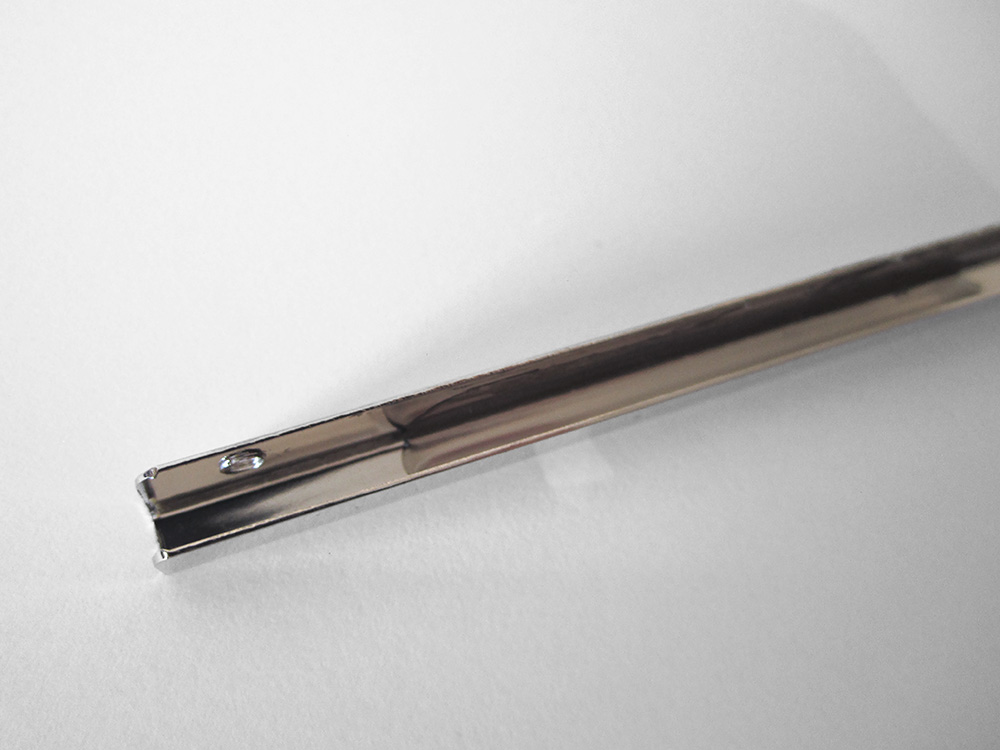
- metal trim and its screws (they come with the trim)
- all-purpose strong glue (fabric, metal, etc.). I use “UHU Colle tout Power”.
- a screwdriver with a small head (the screws are tiny), and if it’s magnetic, even better!
La Mercerie des Créateurs, in France, sells straight trims in gold, gun and nickel finishes.
Tutorial
For this tutorial, I’ll be installing a metal trim (nickel finish), on the pocket of the Cadence bag. The piece where the trim will be installed (pocket, flap, etc.) must already be lined !
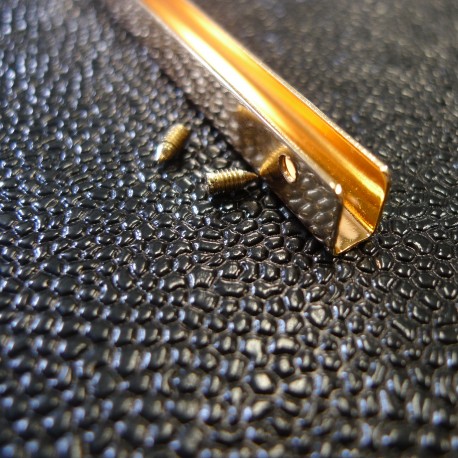
1- Put a little all-purpose glue in the middle of the gutter.

2- Spread the glue towards the ends: be careful not to put glue within 1 cm of the screw holes and the ends of the trim. We don’t want the glue to overflow on the fabric! You can spread the glue with the tip of the glue tube (without pressing!) or with a pin, for example.
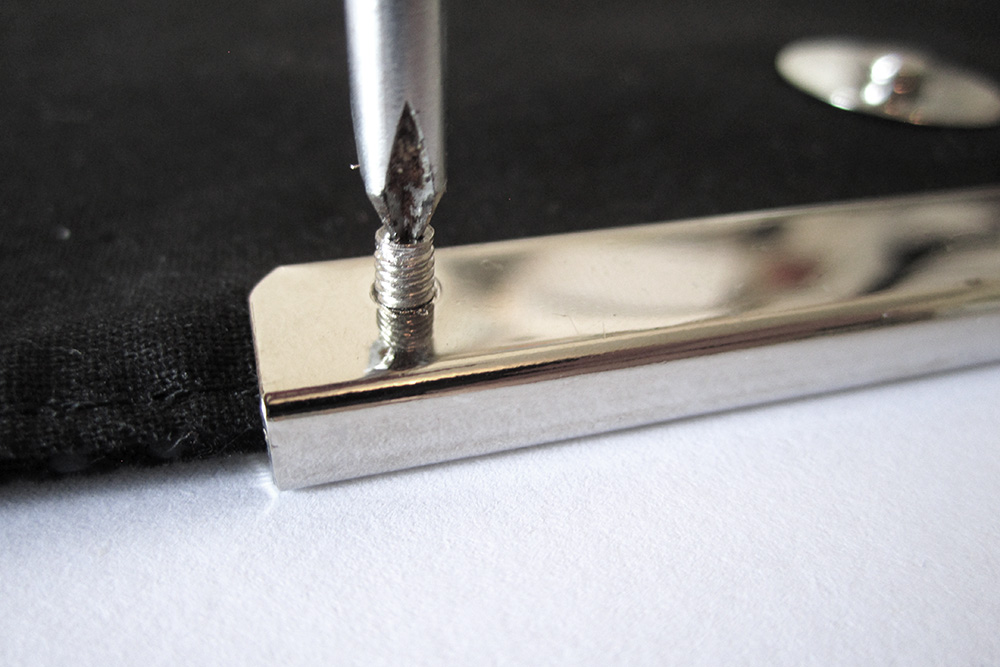
3- Put the trim in place over the piece edge, screw holes on the lining side.

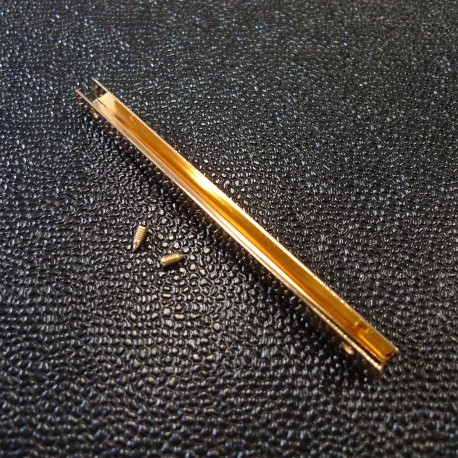
4- Tighten the 2 screws. I strongly advise you work over a towel or on a surface where the screws will not roll away !
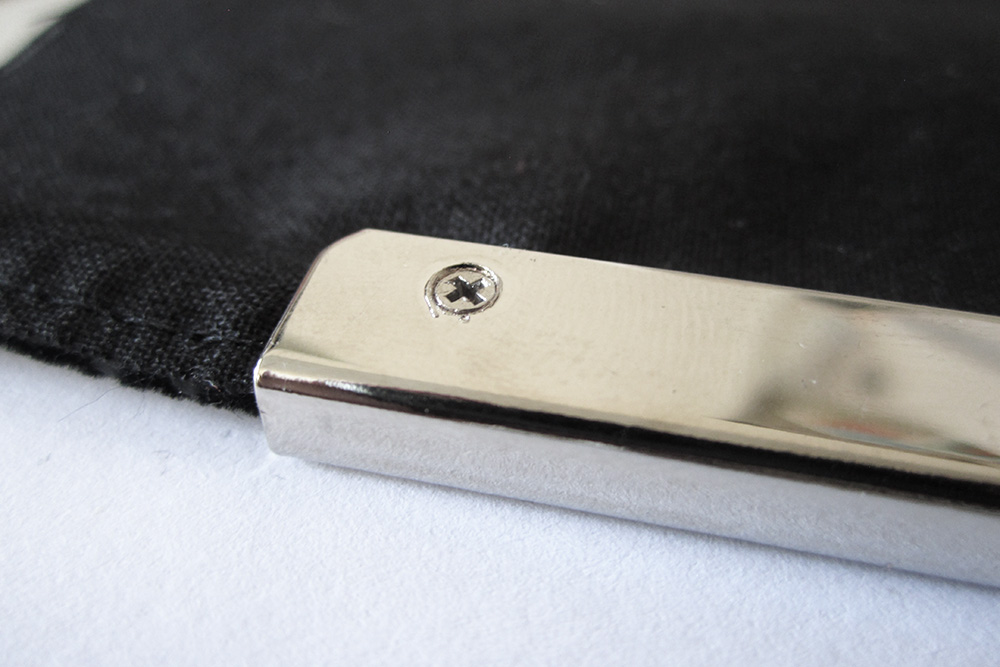
Allow the glue to dry for a few minutes before handling the piece further.
Here are 2 metal trims installed on some Cadence bags.
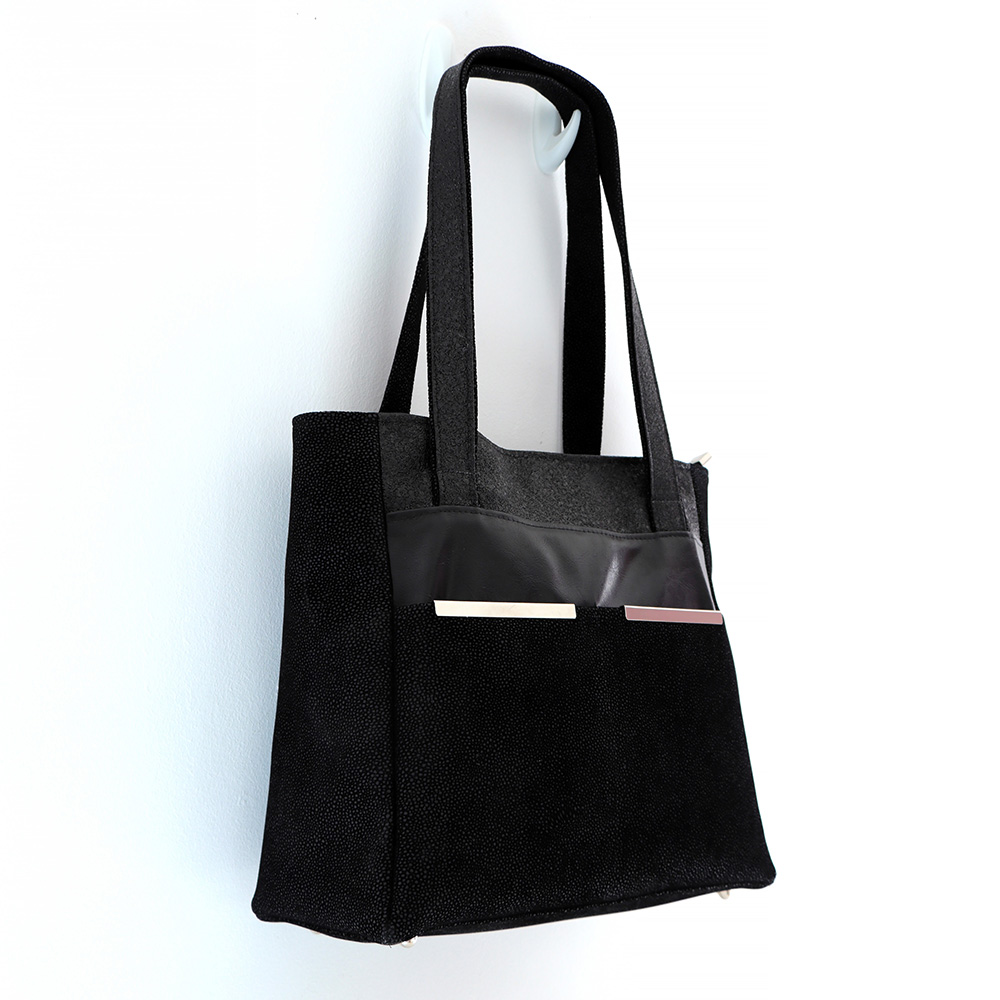
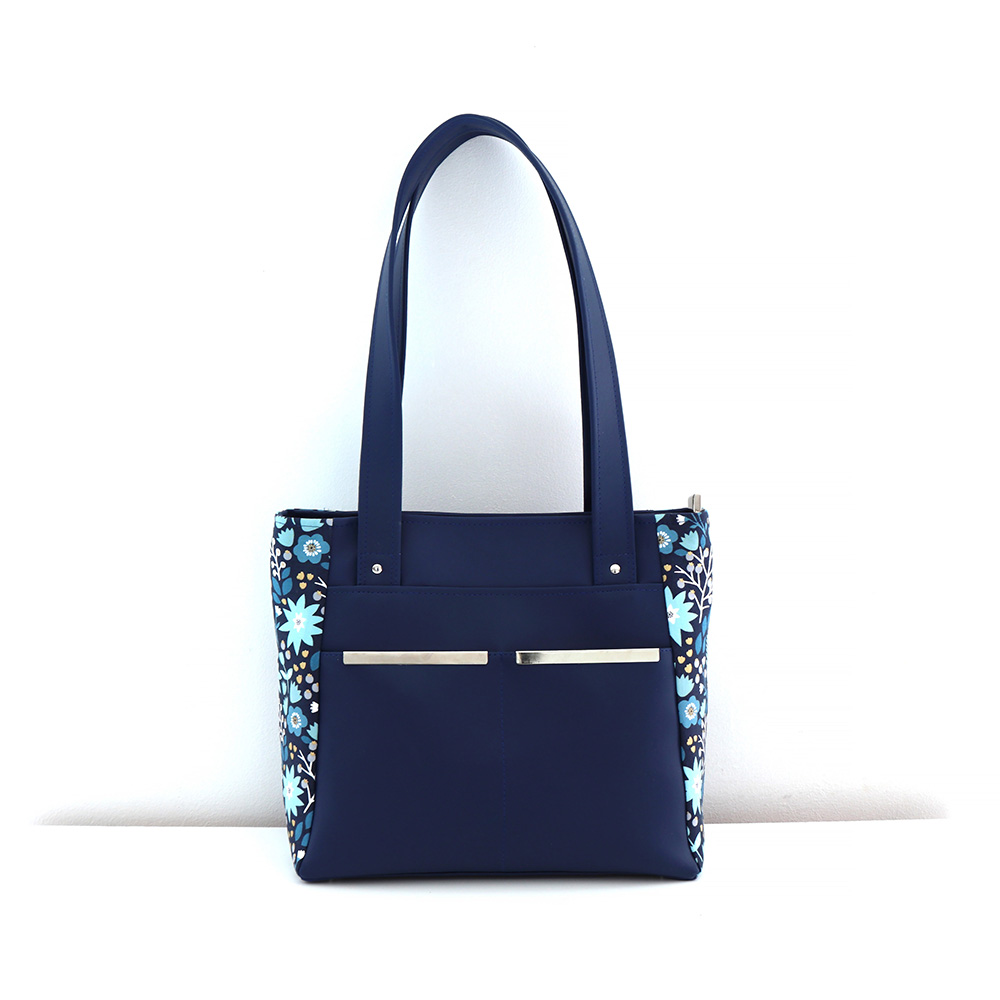

What can adding a metal trim do to enhance the look of your bag?