
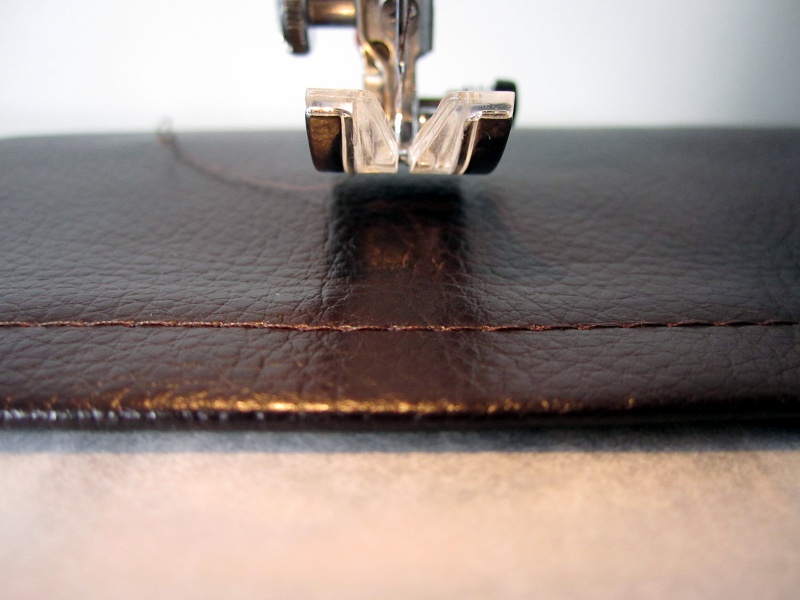
Topstitch faux leather can quickly become an ordeal. Some faux leather are no problem, but others can be very stubborn, preventing your presser foot to slide properly and creating ugly stitching (see photo at the end of the post).
Teflon, roller or walking feet are often a great help in this case, but what if you do not have one on hand?
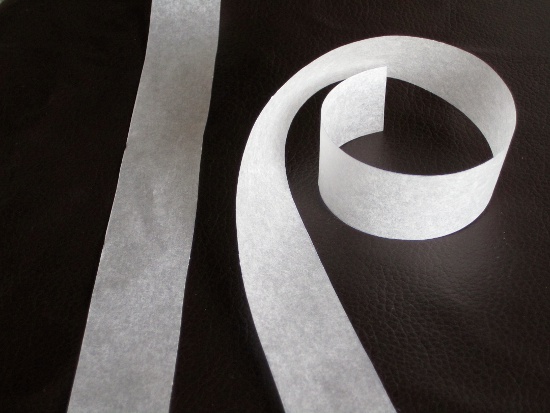
Here’s an easy trick to toptstitch a stubborn faux leather. The best thing is, the trick uses something you already have in your kitchen: wax paper or parchment paper. Yes, the one you buy in rolls at the supermarket and use to bake pies and cakes !
Topstitching faux leather with a regular presser foot tutorial
Cut
Cut 2.5 cm (1″) wide strips of wax paper or parchment paper. Strips must be at least as wide as your presser foot + seam allowance.
The length of the strip should ideally be that of the stitchline you’ll have to sew but putting several shorter strips end to end will work perfectly and will sometimes be more convenient.
And if the edge I have to topstitch is rounded?
If the edge is rounded you can’t use straight strips of parchment paper because they can not follow the curve while remaining flat. So, in this case, trace the curve on parchment paper and cut a strip that follows this curve. This way the parchment paper will fit perfectly to the contour of the faux leather.
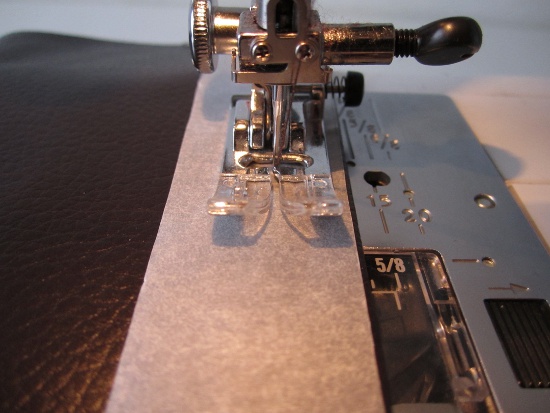
Align
Place a strip of wax paper on the faux leather, lining its side to the edge you need to topstitch. This way you can still use the edge of the faux leather as a guide for topstitching.
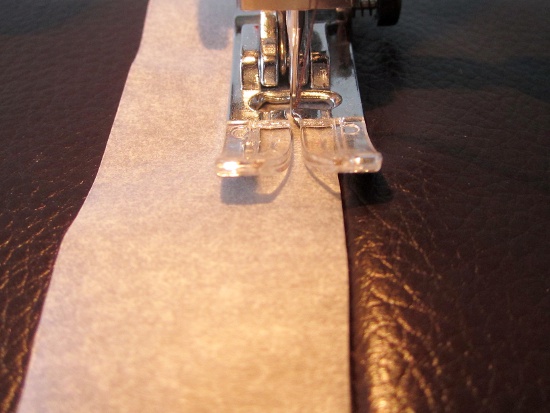
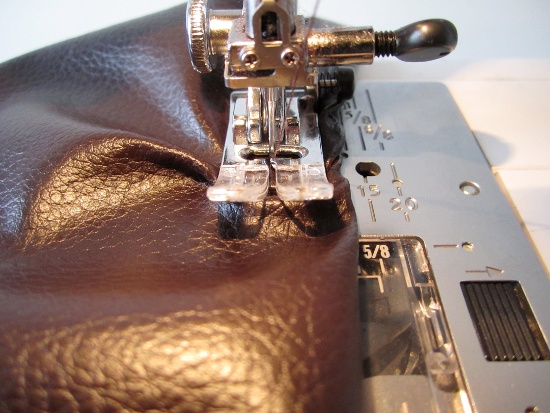
Stitch
Needle : denim needle size 90 or 100
Stitch length : 3.5 to 4.5 mm depending on the number of layers and thickness.
All these settings will of course need to be tested on a scrap of faux leather, using the same number of layers!
Topstitch using the needed seam allowance : it ‘s easy use the right seam allowance because the edge of the paper is aligned with the edge you need to topstitch.
Tear away !
Remove the parchment paper by pulling it at the base.
Small bits of paper can remain stuck below the stitches, do not panic, you can easily remove them with your fingers. Much more easily than tissue paper, which often requires tweezers to be removed.
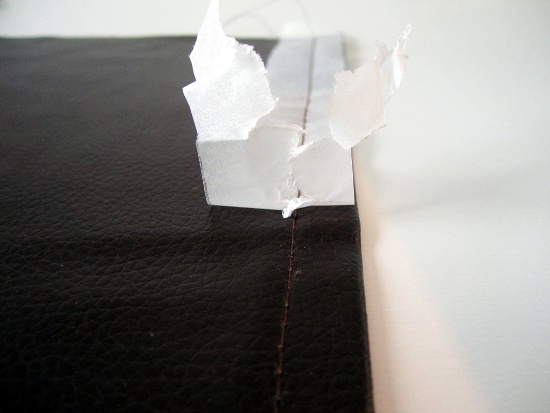
This is what happens if trying to topstitch the same faux leather without parchment paper
A nightmare !
Voilà ! Piece of cake, non ?
(Ahah… baking paper… cake… Sorry^^)


Hi, thanks for these great tips.
I’m sure I wont have any more troubles sewing faux leather.
I just bought one of your patterns in Craftsy, they are all lovely.
Congratulations!
Fernanda
Merci Fernanda.
Don’t hesitate to contact me if you need additional info about your pattern.
Or simply to send a picture of your bag, I’d love to see it :).
Hi thanks for the tips, im having trouble figuring out whether or not I should backstitch when sewing faux leather. My seam was coming out a little sloppy and ive been trying to fix my tension but it seems to work fine on regular fabric. I also notice the seams are coming out messy towards the beginning and end of the stich when i back stitch. I read a tutorial that said one shouldn’t back stitch and to tie ends together and hide in the seam but how exactly does one do that? Any tips or advice would be awesome thanks!
Hi Enakai,
It’s pretty simple : at the end of your stitchline, cut the threads, leaving long tails. Using a hand needle pull the thread tail that is on the right side of your fabric, to the back of the fabric. Now you have the 2 tails on the wrong side of the fabric : tie them together. You might find tutorials / videos on how to do this I think.