
Tutorial using fusible fleece
What is fusible fleece ?
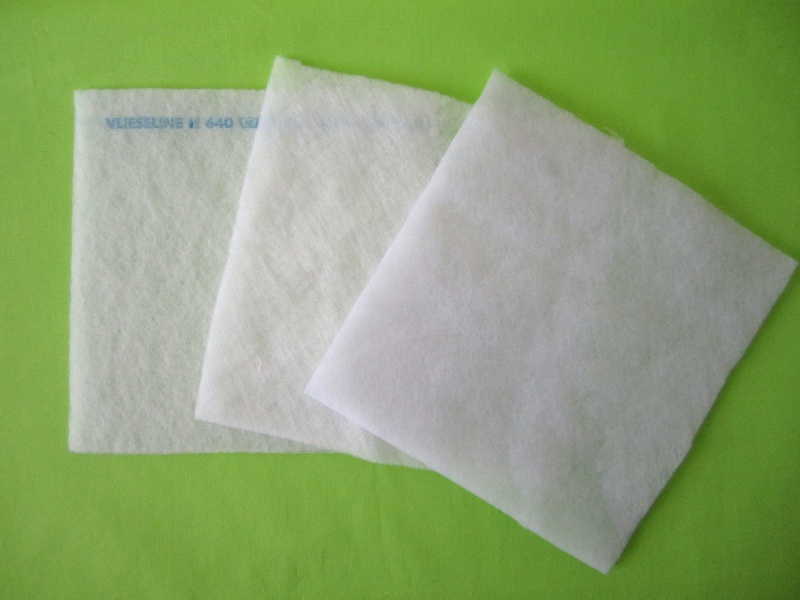
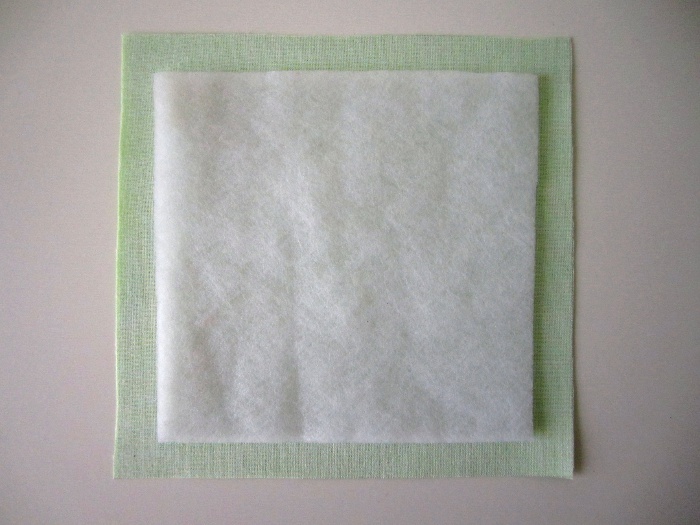
Fusible fleece has one rough/grainy fusible side and one fleece side.
Be careful when pressing as most fusible fleece will melt and stick to the iron sole plate if you press directly on the fleece side. So always remember to use a pressing cloth when you press on the fleece side during construction steps.
The only fusible fleece which supports direct ironing is, to my knowledge, the Thermolam ® Plus Fusible Fleece (which is not available in France, only its sew-in version is).
Fusible fleece is available in different thicknesses. From Vilene/Vlieseline you’ll find two references: the H640 and H630. The H640 is the thicker of the two. The price of these interfacings is high and there are often much cheaper generic substitutes in stores that you can use with pretty much the same result.

The Vilene ones are more “elegant” and of slightly better quality but the difference is not big enough in my opinion to justify the price difference.
I carry samples of various fusible interfacings with me when I go to the fabric store, which allows me to compare with generic interfacings and to usually find a cheaper substitute.
Using fusible fleece
It is essential, in my opinion, to first fuse some regular interfacing to the wrong side of your fabric. Why? There are two reasons:
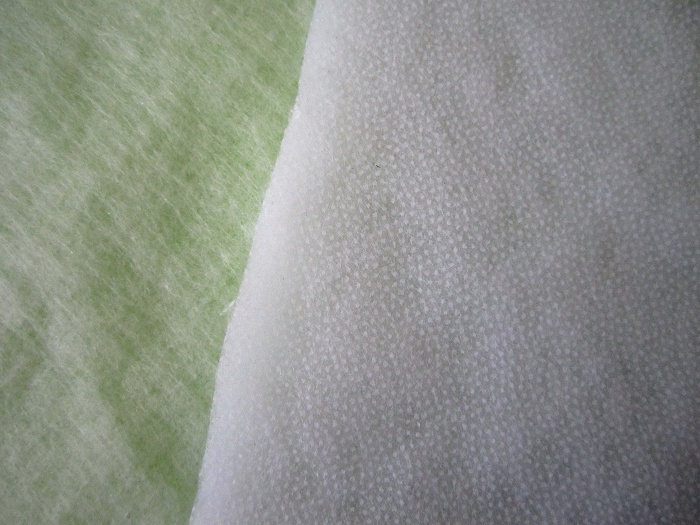
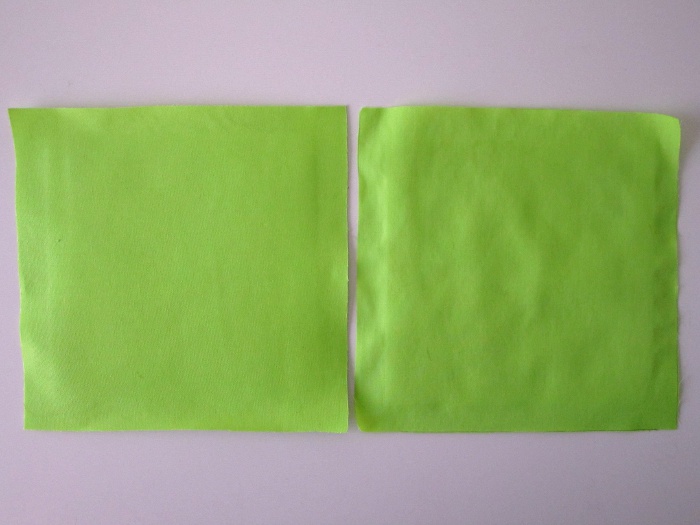
- Look at the pic below : left is a fabric with regular fusible interfacing + fusible fleece and right is a fabric with fusible fleece only. See the bloated, wavy (and ugly ^ ^) aspect that the fabric takes when you apply fusible fleece directly ? Applying a layer of regular fusible interfacing first will prevent this.
- The other reason is that, particularly for bags, this extra thickness of stabilizer further improves the firmness and durability of the bag.
However, note that if the fusible fleece is only applied to the lining of your bag and not to the outer fabric, the addition of a regular interfacing base is not as important because the wavy aspect won’t be visible to anyone but you.
Steps
1. Fuse a regular interfacing to the wrong side of your fabric piece.
2. Cut your fusible fleece to the dimensions of your piece minus the seam allowances.
It is important to remove the seam allowances from the fleece, this will reduce the bulk at the seams and the overall finish will be neater. For the Sacôtin patterns, included seam allowances are 1cm (3/8″).
3. Center your fleece onto the wrong side of your fabric, previously interfaced and cooled down, fusible side against the wrong side of the fabric. Leaving an equal amount of seam allowance all around.
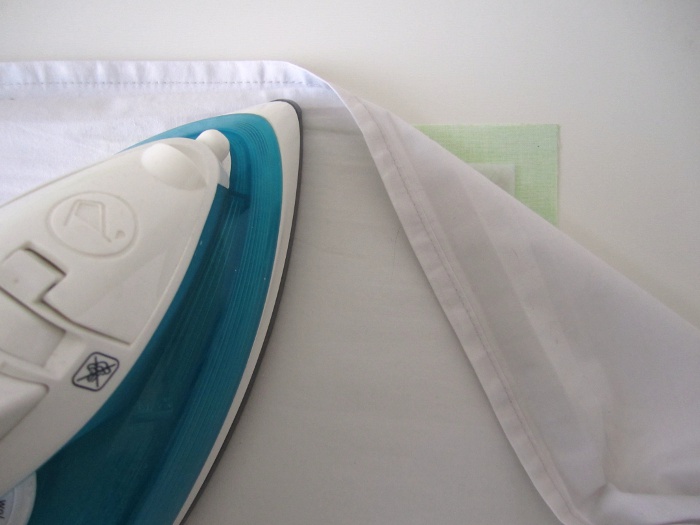
4. Spread a damp pressing cloth over the fleece. I use a white smooth cotton thoroughly wet but not dripping. As a damp cloth you can use pretty much any cotton that won’t discolor (pillowcase, bed sheet fabric, …)

5. Apply your hot iron (set on wool or cotton without steam) on the damp pressing cloth for 15 seconds on each portion of your fabric piece, until you’ve gone over it entirely.
Do not glide your iron : every 15 seconds, lift it and put it down on the adjacent portion.
Important : Let the fabric cool down completely before handling it, this will ensure a better fuse.
Voilà, you’ve just used fusible fleece !

Thank you!
A simple and clear explanation.
I have only used fusible fleece once and I worked out a pressing cloth was needed after I ended up with a sticky, grubby iron.
I didn’t know about using interfacing prior to the fleece. Putting interfacing on before the fleece makes a huge difference. I shall always do this in future.
You’re very welcome !
Yes, using interfacing before the fusible fleece does make a huge difference both in the overall aspect and in the durability and feel of the fabric.
Where can I purchase this fusible fleece ?? Online link ??
Hi,
Yes you can usually purchase it in online fabric stores.
Any link I could recommend would be for French stores, I’m not sure it would be helpful to you 🙂
A link to a French (web?) store would be very welcome to me, though, could you give any recommendations? I’m in the Netherlands and haven’t been able to find anything that doesn’t carry a ridiculous price tag.
Hi Emma,
You can find fusible fleece on pretty much any online fabric store in France. Here are a few links:
https://www.lamerceriedescreateurs.fr/thermocollant/2167-viesline-h630.html
https://www.mondialtissus.fr/catalogsearch/result/?q=molleton%20thermocollant
https://www.rascol.com/vlieseline-h630-molleton-thermocollant-p-222502
https://www.tissus.net/49-53001099_h-630-entoilage-volumineux-vlieseline.html
O, and thank you so much for your explanation! I’d been wondering for a long time about those materials, and now I finally understand what to use and why.
Thanks so much for your tutorials, your explanations are so clear…
Thank you thank you thank you…..that info was soooo helpful, I really appreciate the fact that you explained it so well and that it was easily understood!!!!
Hi,
I’m making slippers and plan on using fleece interfacing under the fabric (cotton 95% elastane 5%). Which type do you recommend, I think its med weight fabric. Also, should I wash the cotton before applying the interfacing.
Do you know which type of fleece fusible interfacing is 2mm thick?
Thanks
Thanks!!!
Hello lovely, thank you for your tip, I’m glad I saw this before I started.
I’m a little confused though – not used fleece before. What is the difference between “Fuse a regular interfacing” and the fuseable fleece?
I have purchased Vlieseline H630 to make a bag.
Hi Terrie,
Regular interfacing will also add stiffness to your fabric, but less structure than a fusible fleece when sewing a bag. I usually use both of them together as mentioned in the blog post. H630 is a good choice.
Here is a post about regular interfacing you might like to read : http://sacotin.com/en/fusible-interfacing-woven-or-non-woven/
I’ve used fusible fleece many times making bags and always hated the rippled look of the fabric. Thank you so much for the wonderful tip on avoiding that. I will ALWAYS use your idea from now on. I just started cutting out a bag when I came across this and it looks sooo much better. Thanks again.
Hi Sandi,
I’m glad this tip helped you !
I just hate when it ripples too, it ruins the look of the bag for me even if it’s perfectly constructed.
If you don’t do so already, I recommend that you use woven interfacing instead of non woven as the first layer. Because, with use, the non woven kind can give a crinkled and creased look to the fabric. More on that here : http://sacotin.com/en/fusible-interfacing-woven-or-non-woven/
Hi,
I am from India. I like to make a beg but confuse about what should I use for interfacing.
and here all those product not available so suggest me any other alternatives or how
should I get all those interfacing. Thanks
renu
10 November 2017
Hi,
I am from India. I like to make a bag but confuse about what should I use for interfacing.
and here all those product not available so suggest me any other alternatives or how
should I get all those interfacing. Thanks
Thank you very much for writing out this blog post! I was just wondering for the normal interfacing before the fleece, is it best to cut the interfacing to the same size as the fabric piece, or cut the same size as the fusible fleece? Thank you very much.
Hi Larni,
You can do either 🙂
If using a fabric that frays, I like to cut it the same size as the fabric piece. It will prevent some fraying. And if using a jacquard fabric (which frays terribly) I even interface the fabric before cutting out the pieces.
If thickness is an issue, I cut the interfacing without the seam allowances (same size as the fleece).
Bonne couture 🙂
This was very helpful. Someone in my quilt guild is teaching a bag class but I don’t use interfacing and have been confused. Our homework directions we have don’t tell us how to iron the layers on at all. They sound like we’re supposed to fuse the two interfacings at the same time which would save time, sure, but doesn’t seem like it would work well!
Hi Jen,
Indeed don’t fuse 2 layers as the same time.
You have to wait until the 1st layer is cold before fusing the 2nd one. And removing the seam allowances of the 2nd layer will help keep the thickness down.
I often use 2 layers of the same woven interfacing, as well as mixing different types of interfacing.
Hi. Can you tell me if I can join fusible fleece please ?
Hi Susan,
You can fuse 2 pieces, one right next to the other with no gap.